Monday, April 9, 2018

Trading Crypto


In my experience, trading is hardest in chop and low intraday volatility in the established markets is a key reason trading is hard. Cryptocurrency trading, which has exploded in the past couple of years has high volatility and affords new opportunities to traders but also new dangers.

The biggest risk in crypto trading is custodial risk. Exchanges can get hacked and lose all your coins. There is usually little recourse if this happens. Second, most of the platforms are substandard in performance, so when there is a huge volume, you may not be able to get your order in. There is also liquidity and slippage risk but that should not be unfamiliar to traders of CL futures.

However, opportunities are big. You can trade tiny size in some instruments and since fees are percentage based, it makes it very affordable to learn trading.

Technical analysis is a lot more simplified in a highly volatile 24x7 market. Many traders can simply switch to daily charts and trade small size with huge stops. Daily and hourly charts give higher quality signals and can be held for a larger duration. Moves are typically large and even with less than 50% of correct calls, you can do well with disciplined trading.

Saturday, June 10, 2017

Nine Transitions -- The book

One of my readers was kind enough to organize all the material in the blog by category. This may be an easier form to consume for most people.

Download Nine Transitions Book

Soon, I will restart the blog with a focus on trading crypto-currencies.

Trading setups have been greatly simplified, enabling easier recognition in time.

We are back in business!

EDIT: Link updated

Friday, October 23, 2015

Patience and discipline as keys to trading


The key to trading is not simply taking the right trades, but to also pass on any trades that don't seem right. After all, its easy to just take every trade and ignore the failures, but this only makes your broker rich.

When the price action is choppy or the signal is weak, wait for the market to move away and give a better setup. This is patience and the key to limiting your losses.

Once you are in the trade, follow your trading plan. Do not be shaken out of your position. Exit where you think is a reasonable and conservative exit. Do not be greedy or your winner may turn into a loser.

Tuesday, September 29, 2015

The shallowest trendline from the prior day


There is a shallowest possible bull and a shallowest possible bear trendline every day. These trendlines have some predictive power as to where the price can turn and trend. For example, the shallowest bear TL from the prior day from HOD and b21 caused a reaction that led to a large move. If the final bar is the highest or lowest bar of the day, then you can use a TCL instead, which has lower predictive use.

Note that when the price gaps far from the prior day's action, the shallowest TL from the prior day may never be tested and you should not wait for it.

Friday, September 25, 2015

Small trend bars in a hard trend


When the first two bars have strong closes and very little overlap, it is reasonable to assume a hard trend is in progress. In a hard trend, any small bar can use used as a signal bar, especially if its a trend bar near the TL (b3). In a pullback, you can often enter above any small trend bar (b10).


Thursday, September 24, 2015

Large inside bar on 1W


Inside bars are tricky and often require judgement to trade correctly. In general, large inside bars are overlaps and therefore a mini trading range. It is generally best to wait for the trade to trigger and take a pullback.

An outside bar that traps traders who did not see the reversal and entered (b23) makes an excellent signal bar if its not too large. If it does not trigger any small trend bar after it (b24) should work.

Tuesday, September 22, 2015

Waiting for chop to end


The day opened choppy from b1-8. From b8-11, bars suddenly had strong closes and shorter tails. This is a sign that the chop is ending.

When the chop ends, the initial move can usually be faded. In today's case, the initial move was a continuation up, which resulted in a large down move. If on the other hand, the move had been down, we would probably see a trend break up

Trading a choppy day


A choppy market is characterized by bars with large tails, occasionally interspersed with overlapping, opposing bars with large bodies. Its clear that the opposing bars are effectively a tail if you consider them in the aggregate.

Capturing large moves in this price action is very hard to do with a tight stop. The large move down from b3 only occurred after deep pullbacks and stopped me out.

There are ways to predict a breakout such as b29 but these are very hard to read. One way to keep yourself out of trouble is to wait for price action to be less choppy, i.e, you start to see more trend bars and less overlap.

If you must trade, deep pullbacks to the trendline are the safest and three push pullbacks are generally safe. Note that in choppy markets, you should always take an early profit and swing entries are hard to gauge.

Often, the mark of the successful trader is that he knows when the odds are against him and knows to sit out of the market when his expertise is not called upon. The trader who frets at missed opportunities is well advised to weigh against the missed losses and be content with making the right choice of staying out of the wrong market.

Thursday, September 17, 2015

The openers: 1W (first Wedge) and 1P (the first pullback in a trend.)


The market often moves sharply on poor signal bars (b2, b9, b12) in three pushes away from the open. The initial move off the open often turns into a W like move (b1-b13)  and results in a potential trend move that usually takes out the other end of the W (low of b1). If the breakout is strong, the move may continue to another measure of the W (distance from b1 L to b14 H).

Often W setups are not clean (b14). When W setups are poor due to overlaps and tails preceding (b10-13), its usually best to let the W succeed (b15-16) and enter on a pullback (b18). The first pullback of a trend gives the best chance for a long swing that can be held till the trend terminates.

Since b3 is a trend move from an ib2 setup, b9 is a 1P setup as well, but with a poor signal bar. It is a good practice to wait for a second entry in such cases.


Wednesday, September 16, 2015

Openers: ib2


When the market opens, either it begins to trend immediately as evidenced by very little overlap between b1 and b2 or it forms the opening range. A market that opens with a trend from b1 can simply be traded as a trend by entering with-trend close to the trendline.

Usually, the first two to five bars represent the opening range and present potential setups that may lead to a trend move, i.e, a sustained move in a predictable direction that can be consistently traded for profits.

The earliest such a setup can occur is during b2, when an inside bar forms with either b1 or b2 having small tails. Today's case with both b1 and b2 being trend bars with b2 at one end of b1 represents the ideal case.

(My stop-limit-buy entry order triggered but was not filled as shown on the right because the market did not pause or return to the price)

When both b1 or b2 are not trend bars or are heavily overlapped, ib2 becomes lower probability and it may be better to pass on the trade. The chances of a large move after stopping you out increase when b2 is not a trend bar.

Note: This setup is still beta and its likely to be removed or changed in the future

Monday, September 14, 2015

The open: Trendlines, Gap and setups


Shallowest Trendlines

The price action of the prior day give rise to two trendlines -- the shallowest bull and the shallowest bear trendlines of the prior day. The shallowest bull trendline is drawn from the lowest point of the day and touches another point such that all the price action past the lowest point is on one side of the line. The trendline should not be concerned about the price action before the low of the prior day. The shallowest bear trendline is similar from the high of the prior day.

When there are multiple points that are at the same point, as in bar 24,25 lows shown above or when the lows are formed by a double bottom of two separate swing points, simply use the most recent as the low of the day, i.e. do not draw a horizontal line.

When the next point is very close as in b28 above, the trendline could be shallow and inaccurate when drawn manually.

The price action of the current day should be expected to react to the trendlines from the prior day and then make a significant move.

If the last bar of the prior day is the highest bar of the day, there is no shallowest bear trendline. On the other hand, you can draw a shallowest bull TCL. TCLs are less significant than TLs and are only used for reversals when the price opens beyond it.

Gap

When the price action of the day opens well beyond the trendlines, the trendlines may not have any significance. When the gap is small (3 to 5 bars distance), a test of the line is likely to occur before any strong trend move. If the price opens between the two lines, there is a good chance of both lines being tested before any significant move.

If b1 of the current day overlaps with the last bar of the prior day and the prior day ended mid-trend move, then for all practical purposes, the open can be treated as its a continuation of yesterdays trend and the shallowest TL from the prior day be treated as the trendline for support, setups, etc.

Chances of an early trend

When b1 of the current day overlaps with the highest and lowest bar of the prior day, or the prior day ended in a large trend leg and b1 of the current day overlaps the last bar of the prior day, chances of an early trend including trend-from-open are high. When the price opens near to the shallowest trendlines from the prior day, it also increase the chances of a significant trend during the open (first 12 bars). On such days, look for 1P setups. You should hold a swing position since this could be a large move.

1W

1W is the default open setup. If nothing else happens within the first hour, its likely that the price will give three pushes in one direction and try to reverse up. In general, opposing bars b1 and b2 represent the opening range. Three pushes beyond to b11 represents the first 3 push of the day and should result in an attempt to reverse the W, i.e. take out the other end of the opening range. If the W succeeds in reversing in one leg, then the price should be expected to at least go further to the measured move of the W.

Wednesday, September 9, 2015

My trading philosophy

Over the years, I have tried many different trading systems and have absorbed the best from the techniques I have encountered and ultimately ended up developing my own system. It is inevitable that you will do the same, even if you use my system as the foundation.

The key drivers of my trading goals were:
  • Getting most of the big moves of the day
  • The ability to sit through a trade, without panicking when it goes against me
  • Predictable losses that I can control
  • Few good trades vs many marginal trades
I arrived at the above after being burnt using alternate philosophies such as:
  • Trying to get all moves: Low win rate, small profits
  • Momentum trading: Needs large stops, hard to sit through.
  • Dollar cost Averaging: Unpredictable big losses
  • Scalping for a few ticks: Good for my broker, not me.
One of the key things that I learnt was that the mind's ability to focus attention wanes over time and judgement suffers. Your first two or three trades are when your judgement is finest. At the end of the day, especially if you have suffered losses already, you will probably make terrible mistakes and have days that will wipe out weeks of profit.

Trading every possible swing is fatiguing to the mind and is not something you can do day after day. Therefore, I chose to focus only on the big moves. That way, one to four trades a day were sufficient for success.

On entering a trade, I learnt that often I would be shaken out when the trade went against me. I deduced that this is because my body reacted viscerally to the open loss during a pullback. I realized that to be able to sit through a trade, I would need to trade with a fixed stop. Over time, the body gets de-sensitized to a fixed loss and you will stop reacting to it and you will be able to execute without emotion.

These observations led me to focus on the open as a source of good trades since many large moves are at the open. Trading the open also has the benefit that I can choose to trade only an hour or two and quit for the day.

Its a viable trading plan to only trade the opening setups. If the open ends up being some sort of trend, it may be worthwhile taking with-trend trades. I generally avoid trading trading ranges or barb-wire. They are notoriously difficult to read correctly.

In future posts, I will describe my setups and trading reports in detail.


Tuesday, September 8, 2015

Market types and setups

The price action that defines markets can be divided into several types and each type has setups that typically work for it. Trending markets for example, facilitate with trend trades and usually cause reversal setups to fail with high probability. Trading ranges on the other hand, facilitate fading breakouts with high probability.

I divide the market price action into the following categories:

Trend (or elastic trend): There is an obvious trending in the market. Bars in the direction of the trend are small, close strong and there are multiple bars in any given trend-side push. Bars against the trend are fewer, usually larger and if there is more than a single bar, closes are usually weaker.

Hard Trend: This is a kind of trend where there are very few bars in the counter-trend direction. With-trend bars can be large or small, pullbacks are usually just a bar or two. This is a very strong trend.

Soft-trend: Bars are very small both trend-side and counter-trend-side. Very shallow pullbacks and pushes.

Channels: Channels look like Soft-trends but with one big difference. Unlike the trends above, a pullback in a channel often overlaps into the previous signal bar.

Trading Range: There is no discernible trend. Erratic movements usually lasting two or three pushes in one direction followed by pushes in the opposing direction. A move in one direction may or may not reach the other side before reversing, therefore hard to gauge profit target.

Barb Wire: A special kind of Trading range where the price action is confined to a narrow range made of small bars, many of which are dojis

The Open: Markets that have "Regular Trading Hours" have opens and closes for the day and the open of a given day has often behavior that may look entirely unlike the previous day. When the market opens and the first bar begins to form, the market is not in any of the above states yet and is considered to be in the open state. This lasts for about 10 bars or so.

The Setups
Each price action type has its own list of setups. A setup that works very well for hard-trend will fail for a channel and vice-versa. These 30 setups cover every possible large move from any type of price action. If you master these, you can trade any market.

There is a small number of setups per price action type and you can focus on a much smaller set of patterns. Setups marked beta are sustained observations but I'm unsure if they can be traded profitably in all kinds of markets. I may drop them in the future.

Setup List
SetupNameTrade typePrice Action Type
GRb1Gap reversal b1X -- BetaOpen
ib2Inside bar b2X -- BetaOpen
1Fb11st failure of b1XOpen
2Fb12nd failure of b1XOpen
1P1st pullbackXOpen
1FBO1st fbo of ORXOpen
2FBO2nd fbo of ORXOpenGGap
1W1st Wedge of dayXOpenRReversal
1TL1st close at TLXChannelTtrend
1CBO1st channel BOXChannelbbar
1ib1st inside barXChannelb1bar 1
CBPchannel BPXChannelPpullback
CXTchannel XTXChannel1P1st Pullback
SDshallow+deepXChannelSsmall/shallow
fL2failed L2X -- BetaChannelOROpening Range
fL2failed L2XSoft TrendTLTrend Line
STbsmall Trend barXHard TrendBObreakout
Tb1Trend from b1XHard TrendBPbreakout+P
2_1tF2nd 1TFXHard TrendPpullback
2SP2nd shallow PXHard TrendXTexpanding TRI
1TAIL1st TailX -- BetaHard TrendTRITriangle
WPWedge pullbackX TrendBWBarb Wire
TLPP at TLXTrend1TFone tick failure
WWedge ReversalX RevTrend
Rfx2Reversal+fx2X RevTrend
W1PW + 1st pullbackX RevTrend
FBOFx2FBO + FX2X fBOTrading Range
WFBO, DPWedge FBOX fBOTrading Range
TRI BPTriangle BPX BOTrading Range
XTExpanding TriangleX BOTrading Range
BWBOBreakout from BWX BOBW


Setups not listed above such 1Rev, A2, BO, etc are obsolete due to various reasons such as being incorporated into the list above, me not using EMA anymore and inconsistent profits.

Thursday, March 6, 2014

Classes of Knowledge

Anyone taking up trading for a living will eventually ask themselves if trading profitably is possible. This is natural and really is part of an assessment of the mechanics of price action.

The trader is faced with the following possibilities:

  1. A profitable trading system is impossible to construct
  2. A profitable trading system may be possible, but no known system exists
  3. I'm familiar with a profitable trading system, but my knowledge is incomplete.
  4. My knowledge is reasonably complete, but I'm unable to follow its rules.
  5. I'm reasonably knowledgable about my trading system and have the discipline to follow its rules.
#1 and #2 are practically the same, except that #1 has a formal proof. Since no such proof exists, we can easily cross it out. The presence of great traders and professional traders suggest that there are indeed systems that enable traders to trade profitably consistently, no matter how hard it may be.

If you accept the above premises then the only steps between you and success are #3 and #4. #3 is about knowledge and #4 is discipline.

Knowledge and discipline work hand-in-hand. The more knowledge you have, the less you need to do dangerous things and have a greater command over your impulses.

When you first starts trading, the initial waves of success fool you into thinking "I know it all, I have it made". The market schools you over and over and you learn new things. Along with the new knowledge comes the burden of breaking old habits, of dropping setups and patterns of behavior that no longer fit into your understanding of the markets. 

As your discipline holds and you break your old habits, you catapult to a newer level of knowledge and the process repeats. You have not quite mastered your knowledge till you have developed discipline to obey your own rules.

I believe there are four areas of learning and discipline. 
  1. Trend and Chop
  2. Location
  3. Pattern and Bar
  4. Execution
Trend and Chop is possibly the most important to master since without it, your reading is invalid more than half the time. Setups that work beautifully in a trend will fail miserably in a chop and vice-versa. This will confuse and frustrate you and until you master it, you have no line of sight to success. Trend and chop also includes adjustment for hard trends and soft trends.

Good location is easy using trendlines. There are some intricacies but for simplicity, you can simply stick to the trendlines from HOD and LOD, which should work in most cases.

Pattern and bar are a bit more involved and this is where most traders focus (including this blog). Patterns are important, but they are a small part of your overall success. New traders should focus on the other three aspects of trading first and simply take any multi-leg poke of the trendline and not worry too much about specific patterns. 

Execution is very important and includes proper stop placement, money management and trade management. Good money management is more important to your trading success than all the patterns in the world put together.

A good starting point for a trader is to work on trading at good location and executing trades flawlessly.  This is fairly straightforward and sets the trader on the path to discipline. You should be able to follow the simplest rules before you can follow rules on patterns. This is a good application for simulator trading. Once the trader is comfortable spotting location and by implication the general market direction, the trader should focus on determining when the market has started to trend and when it has stopped trending. Staying out of chop is the single best thing you can do after good money management.

The general behavior of patterns and bars come last and they complete your education. Each area has its burden of discipline, which cannot be overstated. Knowing you have to wait for the trendline, yet having to take this one exception will be a struggle till you are able to master your own rules.

In future posts, I will elaborate more on each of these areas.

Friday, February 21, 2014

Trend and chop


The most important criteria to optimize your odds is to trade in the direction of the trend, which implies sitting out when there is no trend. This gives rise to the question of how to determine when the market is trending. A related concern would be the strength of the trend, which can help determine targets.

A trend simply defined, is higher highs and higher lows for bull trends and lower highs and lower lows for bear trends. However, this is too simplistic in practice. Technically, a trend is a sustained move in one direction. The opposite of a trend is chop.

For example, today's open was a choppy open and its pretty obvious from the sequence of opposing bars. But then a trend broke from b16. (Identifying the breakout of a trend before it breaks is called the breakout problem and is an active research topic.)

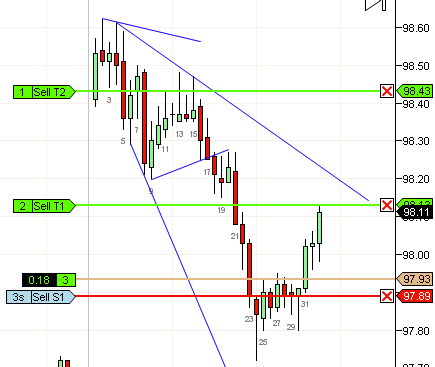
Once the trend breaks, you would need to wait for a setup at the trendline. In general, the setup needs to be a multi-legged and/or deep pullback. The picture above shows several ways to draw trendlines. The purple line is simply an inferred trend line drawn parallel to the TCL from the prior two pushes. The bear trendline from b7-b16 is the shallowest bear trendline that can be drawn from the HOD. Similarly the trendline b37-40 is the shallowest bull TL that can be drawn from the LOD.

The shallowest TL is the safest, highest probability TL and is the only place you can take swing trades (trades with indefinitely large targets). A sustained breakout such as the one below b11 enables the drawing of a steeper TL that sometimes works at least once (this is due to the fact that strong breakouts usually have at least one more leg). Note that the breakout above b33 for example was a strong move but not a sustained breakout since it did not continue for many bars and many ticks.

In most cases, there are at most two trendlines, the shallowest bull and the shallowest bear. In a bear move such as today, every new pullback after a new push down will attempt to create a new shallowest bull TL that could break and give a new move down. The steeper the shallowest TL, the stronger the trend.

The first achievement in trading is predicting the direction of the market correctly. The shallowest TL is the simplest way to learn to guage direction. Waiting for the price to poke beyond the trendline before taking a trade will ensure at least directional correctness. To start with, disregard, breakouts and reversals. Wait for an obvious trend and wait for price to pullback to the shallowest trendline and take every trade. You may use a bar stop in the beginning or even a tight stop and not worry about the win/loss because your goal not really to profit but to learn to read direction.

Once you are comfortable with your sense of direction, you can fine tune your entries to work with a tight stop and later move to optimize exits.


Tuesday, February 18, 2014

The openers: 1W


Its a common suggestion to trade with the trend whenever possible and while its a good idea, often it takes a while for a trend to be obvious. Often the big moves occur early in the day when the trend is indeterminate. Some days such as today, the big move may lead to a sustained trend. Once a trend is obvious, say b40 or so, its a simple matter of waiting for a deep pullback to the trendline (around b57) and then finding the right place to enter.

On most days however, it pays to be on the right side of big moves early in the day, since that may be your only opportunity to take a sizable profit.

Even the open has some repeat patterns that signify potential large moves and studying them enables you to be on the right side of a large move.

The overall idea is that the first bar or the first few bars represent either a trend or a trading range and the way price moves beyond it will enable you to determine the pivotal move of the day.

Openers fall into various classes based on how the first few bars relate to each other. A large first bar usually signifies high volatility and potentially a large day.

The simplest opener is 1W (first wedge of the day). This represents a 3 push move in one direction that turns into a reversal. Sometimes the 1W can be a 3 push pullback after a large move in one direction.

1W usually results in a sustained move for the rest of the day (or at least the next couple of hours). 1W that are also WfBO adds strength to the pattern and are usually good for at least the other end of the range.

In general, its beneficial to take the higher low (b21) rather than take a bad bar (b15). When the move takes out the other end of the W in one leg (did not happen today), its usually a sign that the price will move a measured move in the same direction (which did occur).

ProTip: Any weak move from the open could 1W and turn around.


Thursday, January 23, 2014

The first principles


The single most important factor in your success is your ability to distinguish when a given market is tradeable and when its not. Until you are able to make this distinction, you will never be a successful trader.

The primary criteria for trading is the presence of a trend or potential for a trend. A trend simply defined is when swings in one direction are disproportionally larger than swings in the opposite direction.

This brings us to the first primary skill that a trader needs to work on. The ability to notice that longs were the direction to trade in the AM today until about b35 or so. The ability to notice when the swings are no longer disproportionate is an integral part of the same skill.

Once you identify swings are larger in one direction and smaller in the opposite, the trend direction is obvious and you should only take trends in the direction of the trend. When the swings are large, it may be possible to trade swings in both directions such as when the trend turns into a broad channel but my advice is to avoid counter-trend trading until you are profitable trading with-trend. If a trend is present but the swings are not large enough (shallow trend), you should not be trading. Learn to sit out of the action.

The second criteria in trading is knowing whats a reasonable target for your chart. Your target needs to be larger than your stop. Ideally, your target should be twice your stop or better. Otherwise, the win-rate you would need to be profitable is unrealistic. In case of CL, 20t seems to be a reasonable profit target on days with good trend action. For example, b1,b11 and b29 all went 20t before pulling back.

My investigations into MAE have shown that 5t is a reasonable stop for the best trades and therefore, I can trade with a target at 4x the stop size. I have eliminated setups that would require larger stops. I have also eliminated ema and related setups. I expect to exit my position fully at 20t in more than 90% of my trades.

The heaviest losers in trading lose because of three reasons. I call them the three Cs

1. Chasing
2. Counter-trend trading
3. Chop

The first two great evils can be controlled by trading only setups at the trendline. (Chop is much harder to avoid (I'm still learning) and we shall talk more about it in future posts.) Indeed, the trendline is all you need to draw, and in many cases, it may be obvious enough to be superfluous.

Thursday, January 16, 2014

Tight stops and other simplifications


I've been trading 5t stops for a while and so far, its been rough on my win-rate, even though my general direction on a trade may be right. For example, a larger stop (but not 10t stop) would have probably yielded a 20t profit on the short below b7.

The small stop is possibly changing my behavior as well, making me take on some riskier trades. This could be something I just need to work on and get used to. However, I believe that in the long term the 5t stop will pay off very well.

Meanwhile, I've been working on general simplifications to the trading model. One of the reasons traders cannot recall their knowledge base during trading is due to the way human mind works in times of stress.

A trader looking at the screen has four loads on his brain: Visual, Intellectual, Memory and Motor. This is called the VIMM model. The more visual elements on the screen, the harder your brain needs to work just to recognize patterns. Removing everything possible helps you focus on a smaller set of variables. Ideally, you would only focus on one variable. Removing the ema and volume bars has direct effect of freeing up visual work.

Once your vision has processed symbols, your intellect works on recognizing patterns and performing analysis. Your memory enters the picture next, recalling every piece of data relevant to the situation at hand. Last but not the least, you need to actually enter the order in time.

It is a known fact that each stage when simplified, frees processing power for the others. Its also known that stress impairs memory and instincts are heightened. This is why memory failure during stress is so common.

My current hypothesis is that the innumerable patterns and setups scanned for by price action traders are a huge load on the intellectual and memory systems of traders. Under stress, people are unable to process information efficiently and this often results in making mistakes that are obvious in hindsight.

My approach to this problem is to have very few setups. The real factors in trading are time of day, volatility and money management. Setups are important, but secondary. As you can see today, one or two hours on the open is the best time to trade. The rest of the day is often lukewarm. Today is also a poor day to trade because there is no real volatility. On a big day, you can simply enter with trend and ride it out. The 5t stop is the money management and trade management piece. Despite a win rate of only 20%, my Profit Factor for the day is 1.78, which is decent. This enables me to take on more experimental trades enabling me to broaden my knowledge and enhance my trading system.

I'll post more on these in the coming days.


Tuesday, December 10, 2013

Random walks and predictable trends


The random walk hypothesis suggests that market moves are purely random and what appears to be trends are simply accumulation of sporadic random moves that happen to occur in the same direction for a duration of time.

The idea is that buyers and sellers mostly cancel each other out, and the net difference causes a perturbance in the  price of the underlying.

The random walk hypothesis is pretty absurd since it assumes that the probabilities of buys and sells stay same with price movement. It should be obvious to even the lay person that a stock at $1 can have twice the buying pressure as a stock at $2.

Traders know very well about herd mentality, the rush to join a successful move and abandonment of a spent move. Fear and greed are the true drivers of the market, not randomness. This is true at least for trending markets.

However, when the market is not trending, random movements are perfectly possible. To figure out what movements are random, I ran a simulation where every move went up or down based on probability. When the probability is 50%, the market essentially becomes BW (as in b2-b5). When the probability is slightly imbalanced, we get a sloping channel (b49-59).  In general, if the bodies are sloping, its a slightly imbalanced channel. In either case, they are traded the same way. You wait for a trend to break (b9 was LL-LH-LL) and then take the first pullback (b15 or a better bar at b17) or wait for the breakout to reverse and take the reversal (b24 or the next HL, b30)

Taking the correct bar with the right stop is tricky and deserves its won post but as you can see on this day, its possible with some practice. Moves from randomness often lead to sharp trend attempts that often reverse or otherwise get arrested, so its important to take profits conservatively.


Monday, December 2, 2013

Smaller stops, larger gains


After an in-depth survey of my trading results, I discovered that my best trades have the least maximum adverse excursion (MAE) or pullback. Many were under 5t. Therefore, I embarked on an investigation to figure out if it was actually possible to trade on a 5t stop if I chose my trades very carefully. The trick was to find a way to objectively measure the effectiveness of such a small stop and whether a larger stop (10t) would succeed on the exact trade if a 5t stop would fail. One way to do this was to have two stops, one at 5t and the other at 10t. And then measure fraction of trades that were successful on 5t stops.

The plan was to have two stops on entry at 5t for two contracts and 10t control for an additional contract. Once the price moves past the entry bar, all stops could be tightened to 5t.

The three possible results are:

  • both stops taken out: Trade was a total failure
  • 5t stop taken out, trade eventually fills at least 20t: Trade was a partial success
  • neither stops are taken out: Trade was total success


Preliminary results suggest that most trades that are stopped out with a 5t stop would also be stopped out with a 10t stop.

At this point results are preliminary and I do not believe I have sufficient data to draw a broad conclusion in all market conditions.

However, I do believe that for people whose success rate is under 60% or so, the benefits of smaller losses from tighter stops outweighs the small number of gains lost from partial failures. A 20t gain vs a 5t stop is a 4x profit factor and can greatly steepen your profit curve.